
I've seen lots of tutorials out there for making bow-tie hair clips out of ribbon, but I have this fabric leftover from a previous project that I was dying to use. So this is a tutorial on how to make a bow-tie hair clip from a strip of fabric.
Fabric Bow-tie Hair Clip

Supplies:
- 1/4" fusible webbing
- Measuring tape/ruler/etc.
- 7"x1.5" strip of your favorite fabric
- Hair Clip
- Glue gun
- Iron
Cost: Free for me, I had it all on hand. But if you want to be picky:
- Fusible webbing - $1
- Hair clip - $2 for 6
- I'm gonna go ahead and assume you have the rest. Probably because I have no idea how much a tiny strip of fabric would even cost, lol.
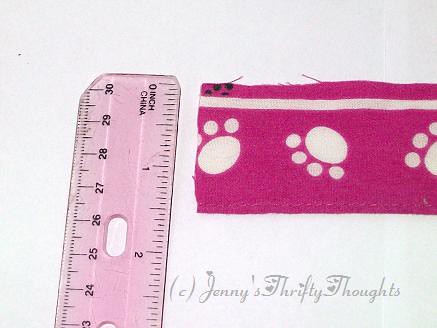
1. Gather your supplies. Here is a photo of the fusible interfacing I used.

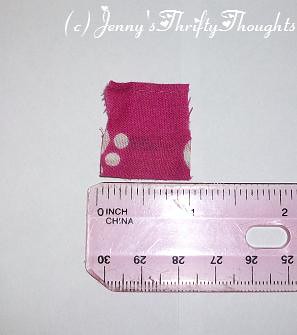
2. Measure your fabric, and cut to make it 1.5" wide by 6" long. I know, I said 7" in the supplies list, just cut it off. You will need it later.

3. Cut a piece of fusible webbing long enough to run the length of your fabric scrap. Fold it over and iron according to the instructions on the webbing package.
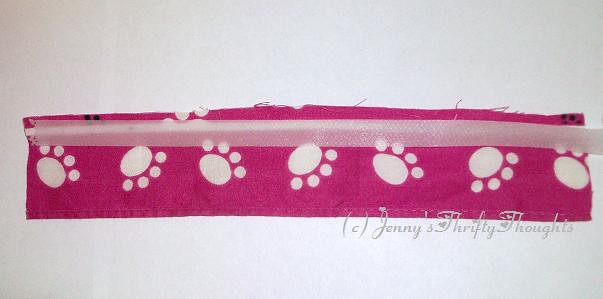

Now your strip should be 1" wide.

6. Using your ruler/tape measure as a guide, fold the right side to the middle, or the 3" mark.
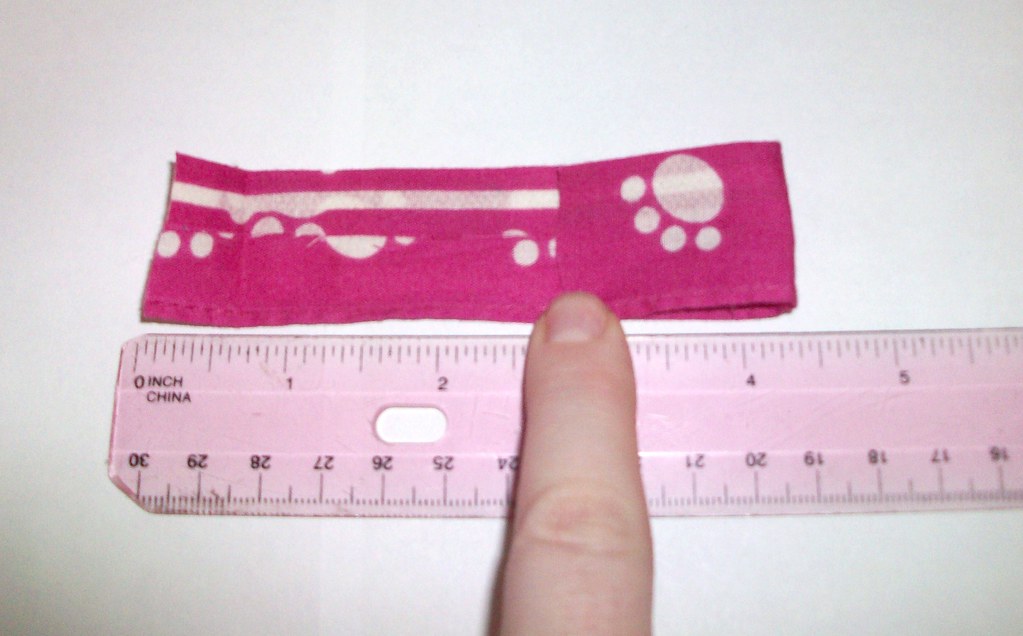
7. Fold the left side to the 3" mark.

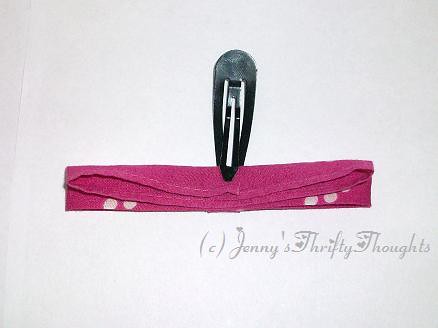
For this next part, I kept it all in place with the clip for photo purposes. The clip isn't really supposed to be there until the end. I'll let you know when it's for real.
8. Fold the bow in half, with the layered side facing outward.
9. Fold each side of the "sandwich" back by half, like below.

This is what it will look like if folded correctly. Now put that aside for a moment.
10. Use the cut off end of your fabric to create the "pincher" for the bow-tie. It should be 1" long and 1.5" wide.
11. Lay a length of fusible interfacing along the middle, fold in, and iron.

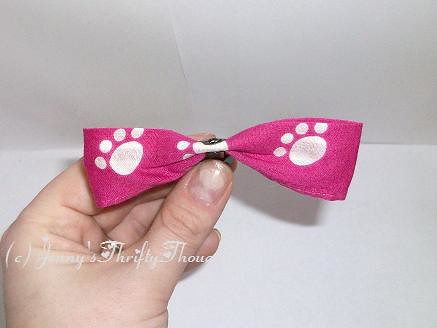
12. Wrap this piece around the bow and loop it through the hair clip (for reals this time! Use the hair clip!). Hot glue it in place.

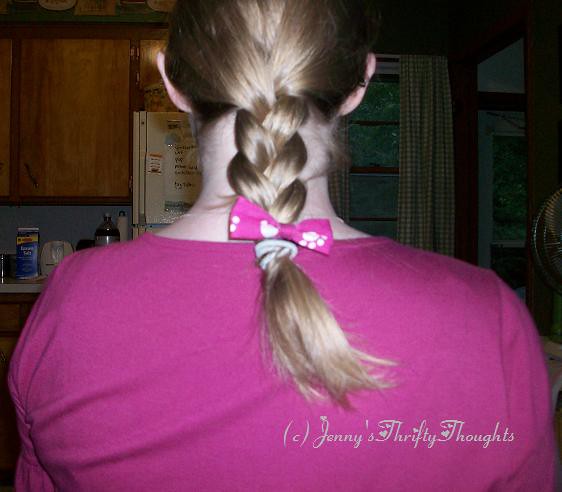
You're done! Here it is on my head (for scale).
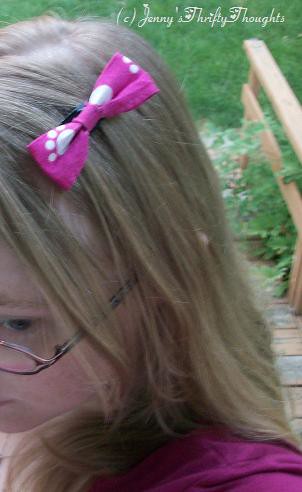
And it even matched my shirt! I swear, I did not plan this.
I got the inspiration for this project from Hip Girl Boutique LLC, who did it with ribbon.
I swear I am going to get the best use out of that ratty old handkerchief I possibly can! LOL.
22 comments:
loved your tutorial, it is very detailed there's no way I can mess up making these cute bows. Welcome to Pink Saturday, so glad you are joining us. Happy 4th too.
Welcome to PS! What a lovely bow and a lovelier model!
Happy PS,
Jacalyn
Great tutorial! Thanks so much :)
Have a happy FIRST Pink Saturday!
Sparkly Hugs,
Tobi and the Pixies!
Thank you so much for sharing this tutorial! I have a new grand daughter and will definitely give this a try! Happy Pink Saturday and welcome, Marcia
Welcome to pink Saturday. When I was a little girl, I had the biggest collection of pink hair bows. This would have been perfect. Happy July 4th. Hope to see you again.
You did a wonderful job on the tutorial! Welcome to Pink Saturday!
Sherry @ A Happy Valentine
Thank you for the instructions. However, I am not into making things anymore, but enjoy seeing what others do. A very nice post for today's Pink Saturday.
Welcome to Pink Saturday. I am new here as well.
A very nice tutorial.
My grand-daughters would like these--pretty nifty! Jacqueline
i like the bow! very cute. happy PS
blessings
marie
Happy Pink Saturday Jenny...
Welcome to the world of pinkness. We are so thrilled you have decided to join us.
I love your tutorial on bow tie clips. A wonderful share today. I have 4 grand daughters so this will come in handy. I may make a few for each of them.
Please stop by and say hi. I would love to share my pink post with you as well.
Country hugs sweetie..>Sherry
Very cute bow, and great instructions!
Welcome to Pink Saturday!
Jane
Flora Doora
Too cute!Great tutorial:) Happy Pink Saturday!
Happy Pink Saturday. Love the pink clip. Wish I had some little girls with long hair. Have a great weekend.
I love your bow and I think that was a fabulous tutorial. I am tempted to go try but I haven't got fusible interfacing and it is 9:34 at night - but....
happy Pink Saturday!
CailinMarie
http://cailinyates.blogspot.com
Hi Jenny, a great tutorial on making this sweet bow tie. It does match your shirt. Good job and so pretty too.
Hugs, Jeanne
Love tutorials...can't wait to see what else you have in store. Welcome to PS!
Niki
Hi Jenny, Pink bows...MY FAVORITE! Thank you for sharing, I'm going to see how they look using some of the pink rose ribbon that I listed on my blog for Pink Saturday, can't wait to try it!
Happy 4Th of July,
(((hugs)))
Karen
Happy Pink Saturday!
Happy 4th. July!
just beautiful tutorial!
Hugs
Happy belated Pink Saturday and I hope you enjoyed your 4th!
Jenny, this is a very belated welcome to your first Pink Saturday. I had a minor surgery on my foot July 3, and I haven't felt much like spending time on the computer.
Great tutorial, and darling clip.
Thanks for sharing this! My photos didn't turn out so I linked to you on one of my projects. You can see it here: http://sabrinaalery.blogspot.com/2010/08/diy-lollipop-dot-ruffle-purse-day-2.html
I don't know how to use the create a link button!
Post a Comment