Supplies:
- Binder - $1
- Plastic shopping bag - on hand
- Clear packing tape - $1
- Security envelopes - on hand (from the copious amounts of junk mail we all love)
Total Cost: $2 (but free for me because I had everything on hand)
Time: 10 minutes (5 of that was for arranging the letters *just so*)
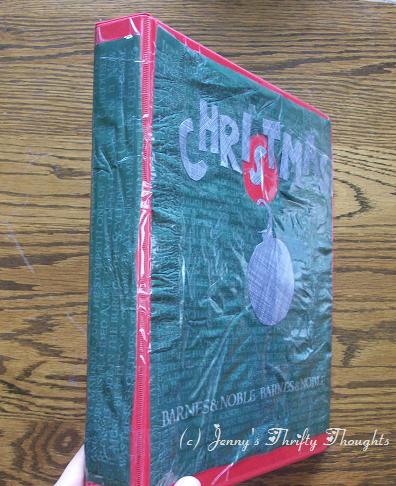
I took a green shopping bag from Barnes & Noble and fused the two sides together. Click here for a tutorial on fusing plastic bags (there are literally dozens of tutes out there on this). I taped it to the front of the binder. I drew the letters onto the insides of security envelopes and cut them out. After I arranged them on the bag, I taped them down. It still wasn't looking Christmasy enough for me. So I winged it and tried to cut out the shape of an ornament to "hang" on the handle of the bag. Here it is:
I rather like how it turned out. Don't you?
With another bag I cut and taped a piece to the bridge of the binder.
Now I know exactly what type of files are in that red binder while looking at it on a shelf!
My dogs, however, think this organizational kick is getting to be a bit much. Hannah is judging me. Teddy is judging Hannah. Lucy (not pictured) doesn't really care if it doesn't involve food.


0 comments:
Post a Comment